Équilibrons des Coupes Géologiques avec Python -- Balance Bitmap
Geological Cross Sections with Python
1. Lancement du programme - Launch of the program - Запуск
программы
Pour lancer le programme, il faut utiliser le terminal dans le
dossier où se trouve le fichier python
BalanceBitmapGeologicalCrossSectionsWithPython.py
On le lance par la commande classique python3
BalanceBitmapGeologicalCrossSectionsWithPython.py
Et on obtient la fenêtre suivante :
To launch the program, you must use the terminal in the folder
where the python file
BalanceBitmapGeologicalCrossSectionsWithPython.py is located
We launch it with the classic python3 command
BalanceBitmapGeologicalCrossSectionsWithPython.py
And we get the following window:
Для запуска программы необходимо использовать терминал в папке,
где находится python-файл
BalanceBitmapGeologicalCrossSectionsWithPython.py
Запускается классической командой python3
BalanceBitmapGeologicalCrossSectionsWithPython.py
И получаем следующее окно:

2. La coupe géologique et la faille de chevauchement - The
geological cross-section and the thrust fault - Геологический
разрез и надвиг
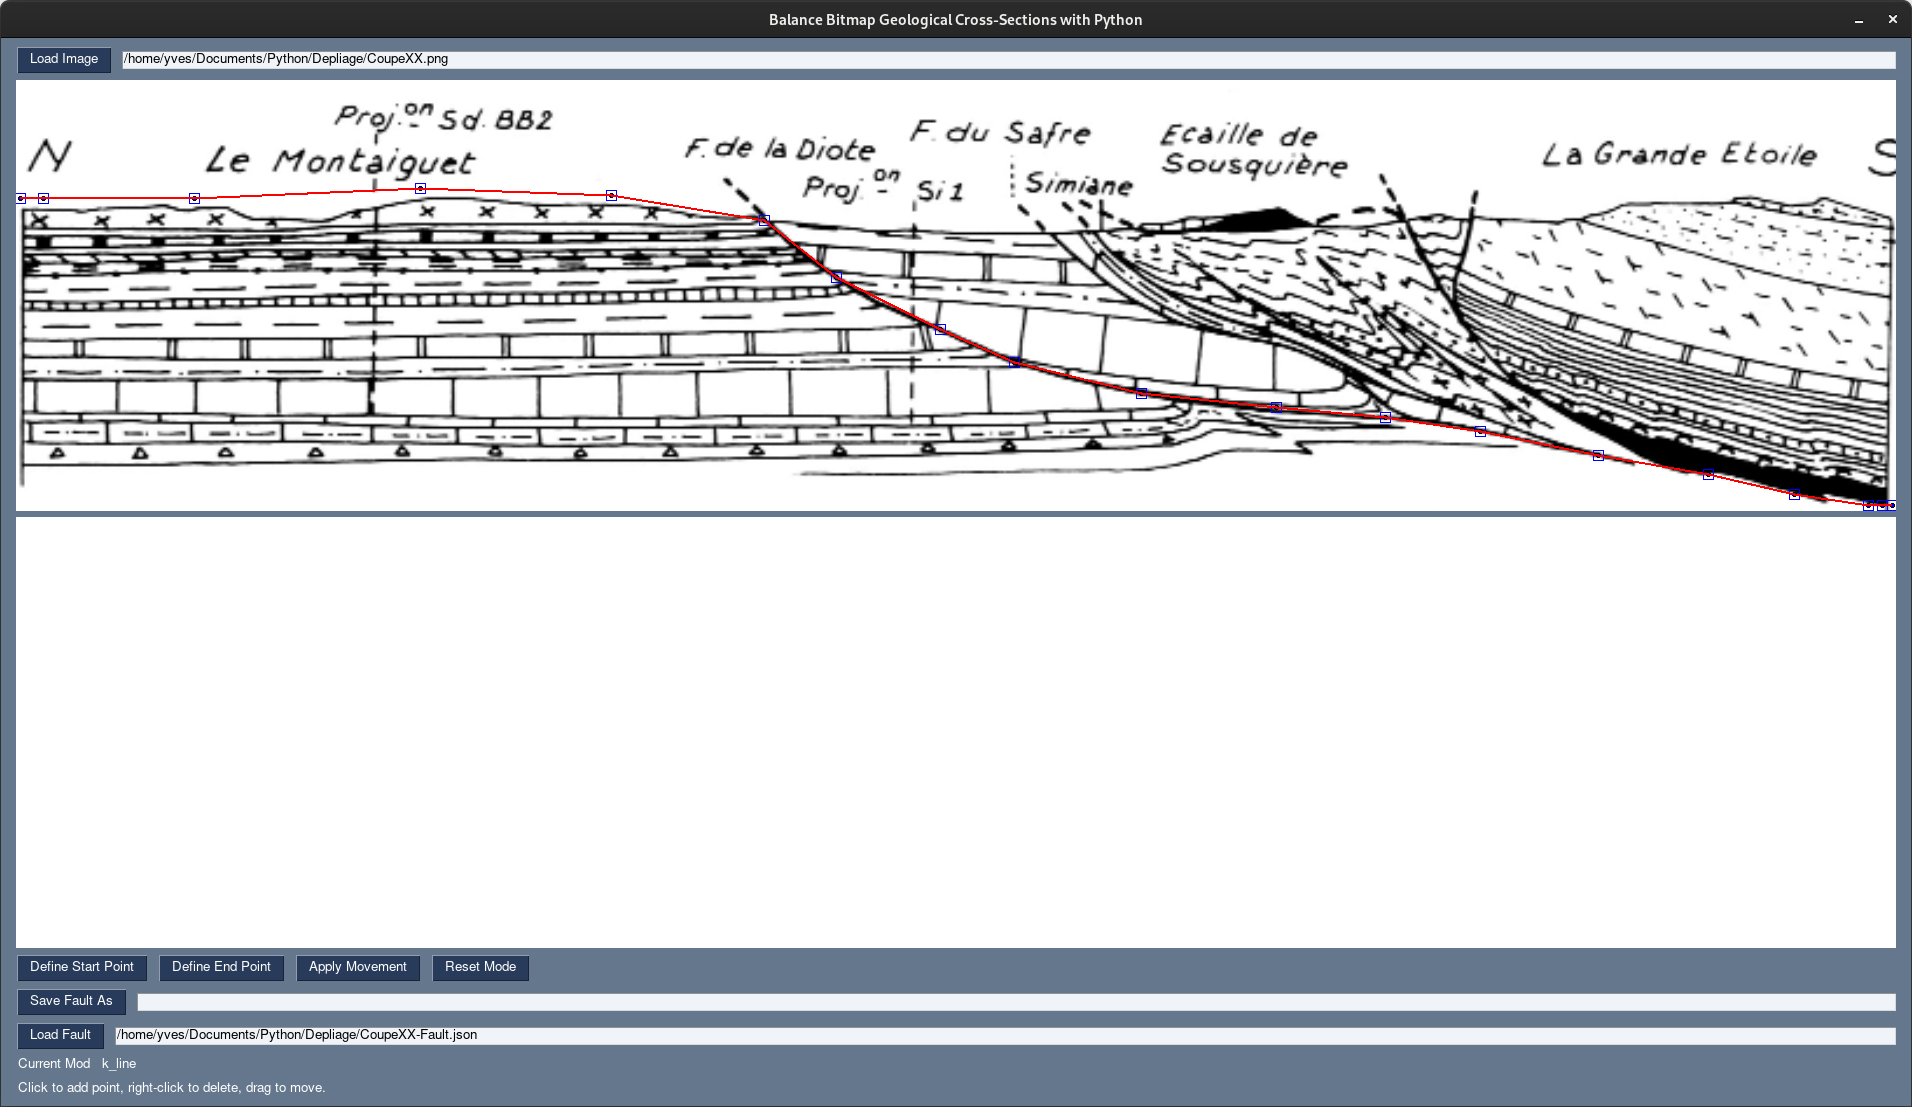
Ensuite, en appuyant sur le bouton Load Image, on sélectionne une
coupe géologique. Ici, on a choisi CoupeXX.png. C'est la coupe du
bassin de Gardanne, de la faille de la Diote, qui est la même que
celle utilisée pour le programme de dépliage réalisé sur l'atari st
en gfa_basic pour ma thèse. Puis, on appuie sur le bouton Load Fault
et on charge le fichier CoupeA-Fault.json
Then, by pressing the Load Image button, we select a geological
cross section. Here, we have chosen CoupeXX.png. This is the cross
section of the Gardanne basin, of the Diote fault, which is the same
as the one used for the unfolding program made on the atari st in
gfa_basic for my thesis. Then, we press the Load Fault button and
load the CoupeA-Fault.json file
Затем нажатием кнопки «Загрузить изображение» выбирается
геологический разрез. Здесь мы выбрали CoupeXX.png. Это участок
бассейна Гардан, разлома Диоте, который является тем же самым, что
использовался для программы развертывания, созданной на Atari ST в
gfa_basic для моей диссертации. Затем нажимаем кнопку «Загрузить
ошибку» и загружаем файл CoupeA-Fault.json.
2bis La faille de chevauchement - The thrust fault - Надвиговый
разлом
Vous remarquerez qu'après le chargement de la coupe géologique une
ligne rouge horizontale est apparue. Pour la transformer en faille
de chevauchement, il suffit de cliquer sur des points le long du
tracé de la faille. On peut supprimer un point en faisant un
clic droit dessus. Il est conseillé de bien placer les points le
long de la faille et d'aller au maximum vers la droite et la gauche.
Cette ligne rouge est une sorte d'élastique auquel on applique des
points de contrôle.
You will notice that after loading the geological section, a
horizontal red line has appeared. To transform it into a thrust
fault, simply click on points along the fault line. You can delete a
point by right-clicking on it. It is advisable to place the points
along the fault and to go as far as possible to the right and left.
This red line is a kind of rubber band to which control points are
applied.
Вы заметите, что после загрузки геологического разреза появилась
горизонтальная красная линия. Чтобы превратить его в сброс-надвиг,
просто щелкните по точкам вдоль пути сброса. Точку можно удалить,
щелкнув по ней правой кнопкой мыши. Рекомендуется размещать точки
вдоль разлома и отходить как можно дальше вправо и влево. Эта
красная линия представляет собой своего рода резинку, на которую
нанесены контрольные точки.
3. Les 2 points de contrôle pour le déplacement - The 2
checkpoints for movement - 2 контрольно-пропускных пункта для
передвижения
Il faut maintenant définir 2 points de référence pour permettre le
déplacement de l'allochtone. On appuie sur Define Start Point et on
clique sur le point qui nous paraît pertinent. Nous avons choisi un
point d'intersection ou de troncature entre la faille de la Diote et
un horizon stratigraphique repérable sur la coupe. Ce premier point
est situé sur le toit de la faille de la Diote. c'est le point vert
le plus à gauche.
Ensuite, on définit un deuxième point en appuyant sur le bouton
Define End Point. C'est le point équivalent au mur de la faille de
la Diote.
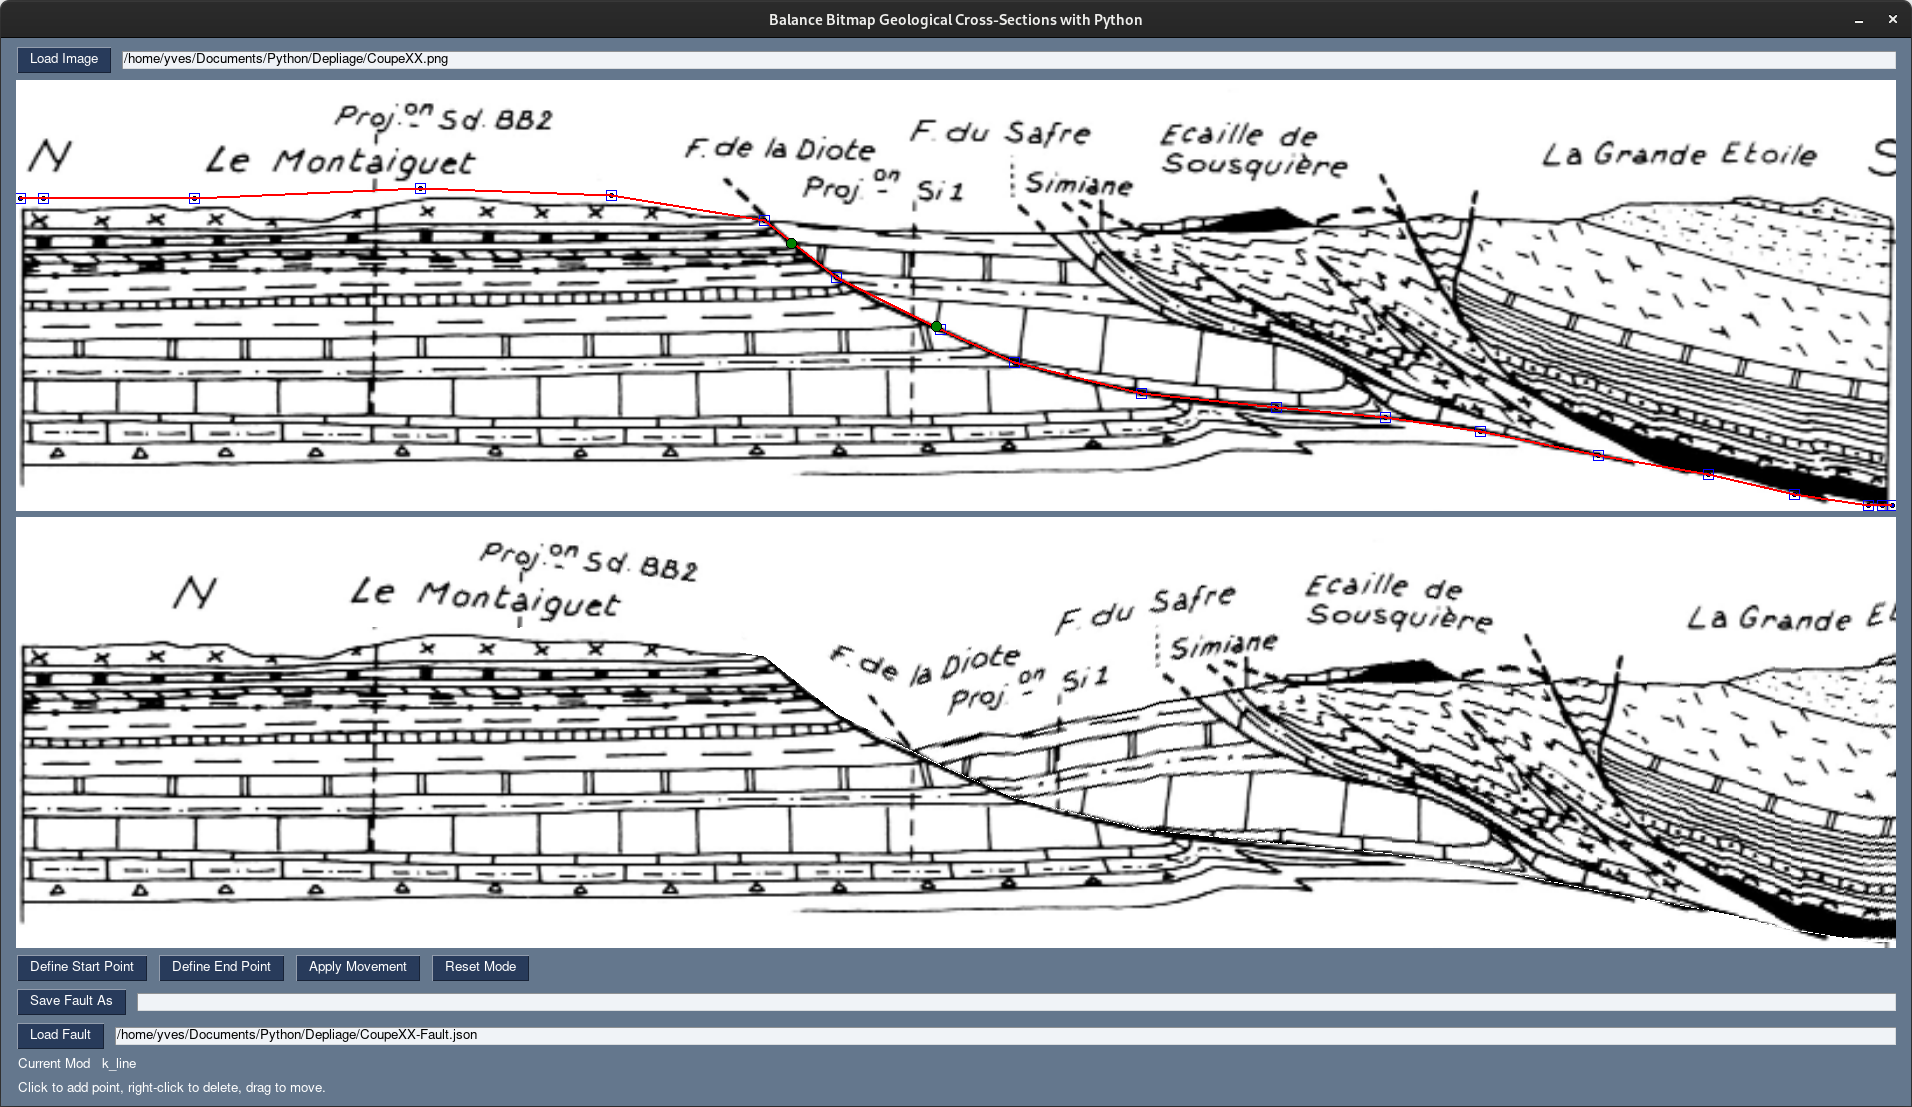
Le dépliage va déplacer le premier point vert vers le second point
vert, ainsi que tous les points de l'allochtone.
We must now define 2 reference points to allow the displacement of
the allochton. We press Define Start Point and click on the point
that seems relevant to us. We have chosen a point of intersection or
truncation between the Diote fault and a stratigraphic horizon
identifiable on the section. This first point is located on the roof
of the Diote fault. It is the leftmost green point.
Then, we define a second point by pressing the Define End Point
button. This is the point equivalent to the wall of the Diote fault.
The unfolding will move the first green point to the second green
point, as well as all the points of the allochton.
Теперь необходимо определить 2 опорные точки, чтобы обеспечить
перемещение аллохтонов. Нажимаем «Определить начальную точку» и
щелкаем по точке, которая нам кажется подходящей. Мы выбрали точку
пересечения или усечения между разломом Диоте и стратиграфическим
горизонтом, идентифицируемым на разрезе. Первая точка расположена на
кровле разлома Диоте. Это самая левая зеленая точка.
Далее мы определяем вторую точку, нажав кнопку «Определить конечную
точку». Это точка, эквивалентная стенке разлома Диоте.
Развертывание переместит первую зеленую точку во вторую зеленую
точку, а также все точки аллохтона.

4. Le déplacement ou le dépliage - Moving or unfolding -
Перемещение или раскладывание
Finalement, on va juste appuyer sur le bouton Apply Movement et le
dépliage va être effectué.
Finally, we will just press the Apply Movement button and the
unfolding will be done.
Наконец, нам просто нужно нажать кнопку «Применить движение», и
разворачивание будет завершено.
Dans des versions ultérieures du programme, nous changerons les noms
des boutons et nous éviterons que les 2 boutons soient de la même
couleur. Nous verrons s'il est possible d'effectuer une animation du
dépliage comme sur le programme en Gfa-basic sur l'atari st.
In later versions of the program, we will change the names of the
buttons and we will avoid that the 2 buttons are the same color. We
will see if it is possible to perform an animation of the unfolding
as on the program in Gfa-basic on the atari st.
В более поздних версиях программы мы изменим названия кнопок и
избежим того, чтобы обе кнопки были одинакового цвета. Посмотрим,
можно ли выполнить анимацию разворачивания подобно программе на
Gfa-basic на atari st.